Change Requests
Option Logs are a section of the workbank where data changed can be proposed and follows a full approval system.
Option Logs can be accessed from the sidebar of any workbank by selecting the Option Logs from the menu.

The Option Logs dashboard will then be displayed.
Option Logs is an area where data update proposals can be entered by users, then approved by people.
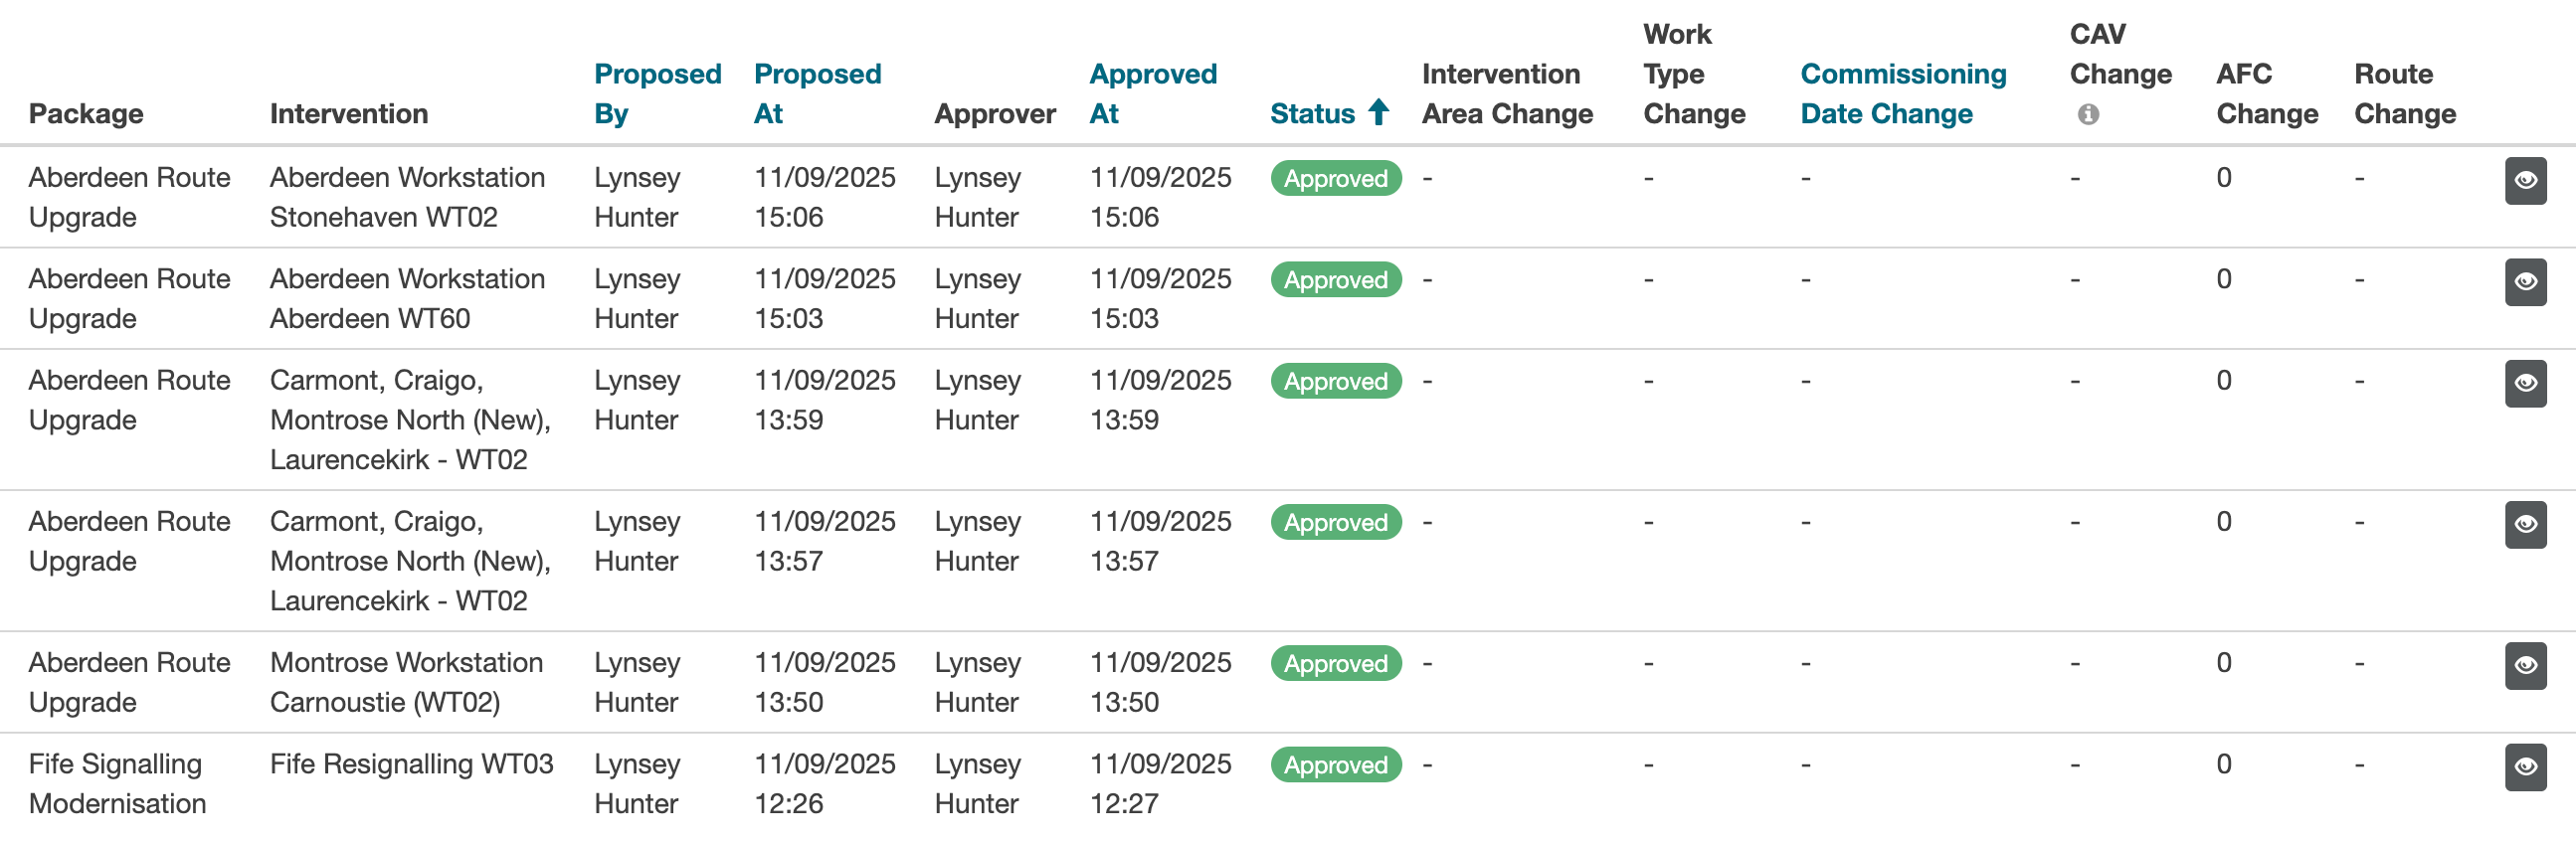
The Option Logs table displays several different columns, including the name of the work package and the intervention where the data change was requested. The name of the user who proposed the change is also displayed.
If the data change has been approved, the Approving user will be displayed.
Status Toggle
The currently viewed status (or statuses) of the proposals can be toggled by using the status toggle. This is available by clicking Status above the table.

To view (or hide a status), toggle the option in the status toggle.
Permission Levels
There are three main permission levels within Option Logs. These are based on the Rail BI permissions.
View Permissions
Users with View permissions can:
- Create proposals
- Edit their own draft and rejected proposals
- View all proposals
It is possible for a View only user to be an approver with the approver permission, but they cannot edit any proposals other than their own.
Approval Permissions
Approval permissions can be granted on top of View Permissions. In addition to the permissions already available, this gives access for Approvers to approve or reject all proposals.
Edit Permissions
Users with Edit permissions can:
- Create new proposals
- Edit all draft and rejected proposals
- Approve / reject proposals.
Change Request Options
There are four main tasks that can be completed from Options Log page.
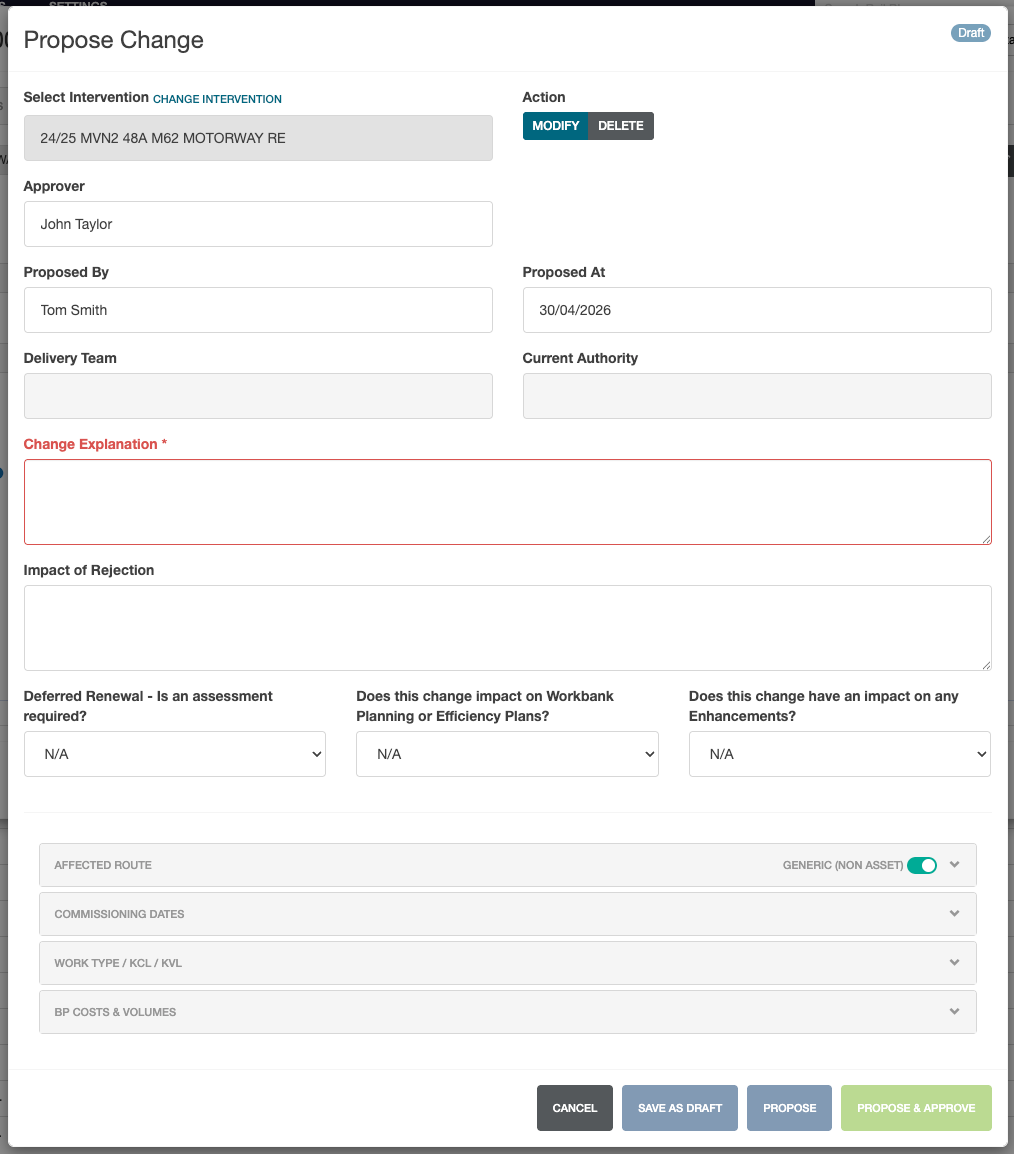
Create New Change Proposal
To create a new proposal, click the green Add Change Proposal.
If a route or region filter is applied, the interventions returned via search will be limited to that route or region.
Change Proposals are only available for interventions that have a project code.
Select the intervention by clicking in the Select Intervention box and searching for the intervention that you want to propose the change for.
The proposed by box will automatically populate with your user details.
Select the data area to be changed (affected area, commissioning dates, work types or BP costs). Multiple data changes can be proposed in a single proposal.
Once an asset area has been added, it is possible to add Post-Intervention SEUs.
-
To cancel the proposal, select cancel.
-
To return to the proposal to complete later, select Save As Draft.
-
If you'd like to submit your proposal, select Propose.
You are now given the chance to enter a comment before submitting for approval. This will be displayed on the proposal history.
When a new proposal has been submitted, the user and the designated approver will be alerted via email.
- Approvers Only can select Propose & Approve. This allows the proposal to be submitted and approved in a single step.
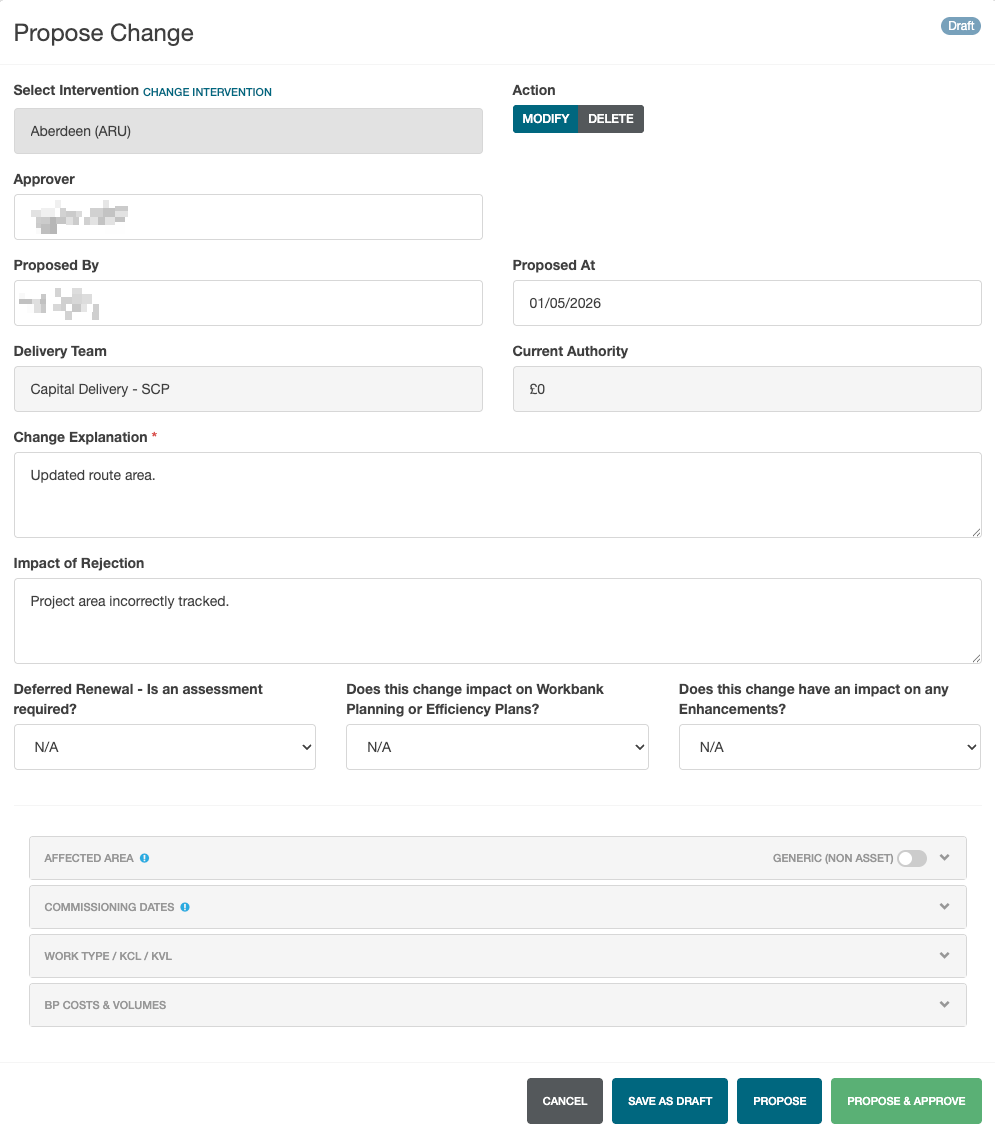
Viewing Change Proposals
To view the proposal, select the View Proposal icon from the right of the table row.
This will display the proposed change modal.
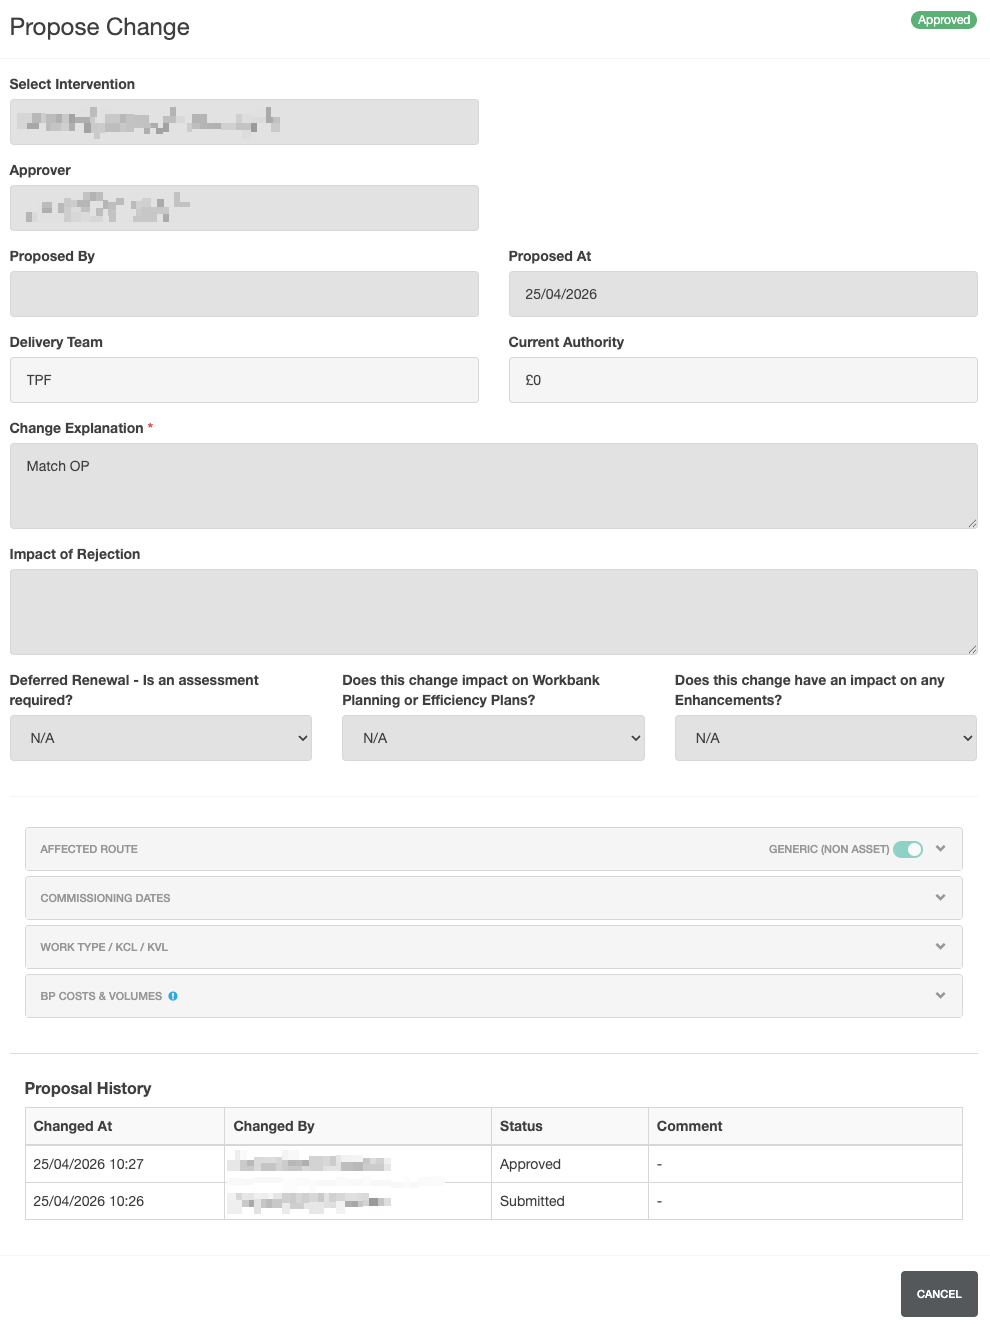
The intervention for the change is highlighted, along with who proposed the change.
For each area (affected area, commissioning dates, work types or BP costs) a data change request is made, a blue icon will be displayed to highlight the data has been changed.
If any proposals have been entered for this intervention previously, this will be displayed in the proposal history section at the bottom of the modal.
Approving Proposals
To approve a proposal after viewing it, select the Approve Proposal icon from the right of the table row.
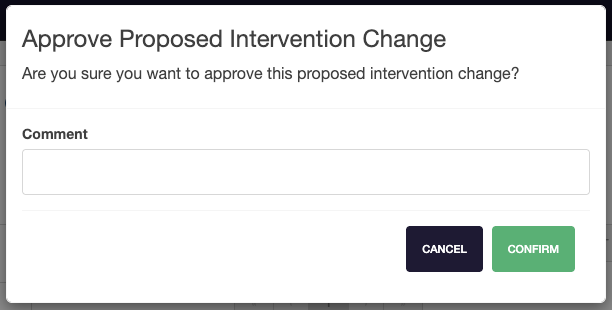
A comment can be entered before approving. This will be displayed on the proposal history.
To approve the change, select confirm. To cancel the approval, select cancel.
Rejecting Proposals
To reject a proposal after viewing it, select the Reject Proposal icon from the right of the table row.
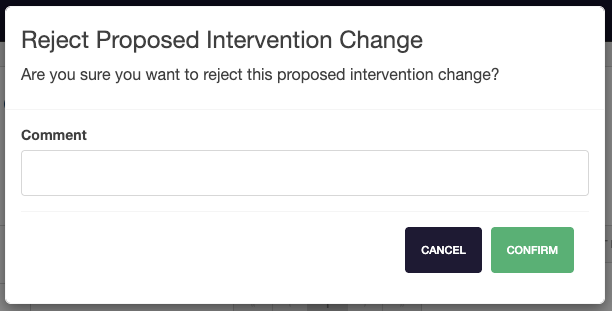
A comment can be entered before rejection. This will be displayed on the proposal history.
To reject the change, select confirm. To cancel the rejection, select cancel.
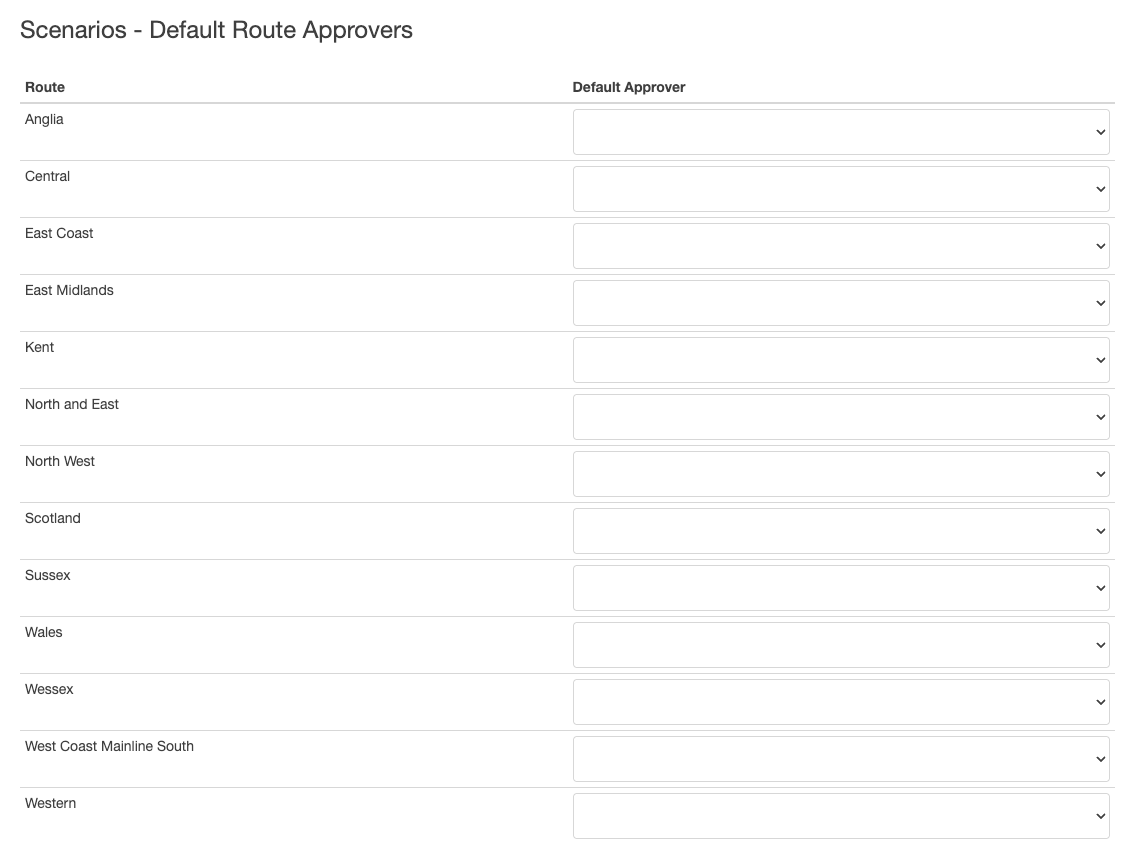
Default Approvers
Default approvers can be set on a per-region basis.
Select the Settings menu from the header, followed by Scenarios then Default Approvers from the side menu.