Asset Schemas
Asset Schemas
Asset schemas for the currently selected routes can be viewed by selecting the hamburger icon from the menu bar, then selecting "Asset Schemas".
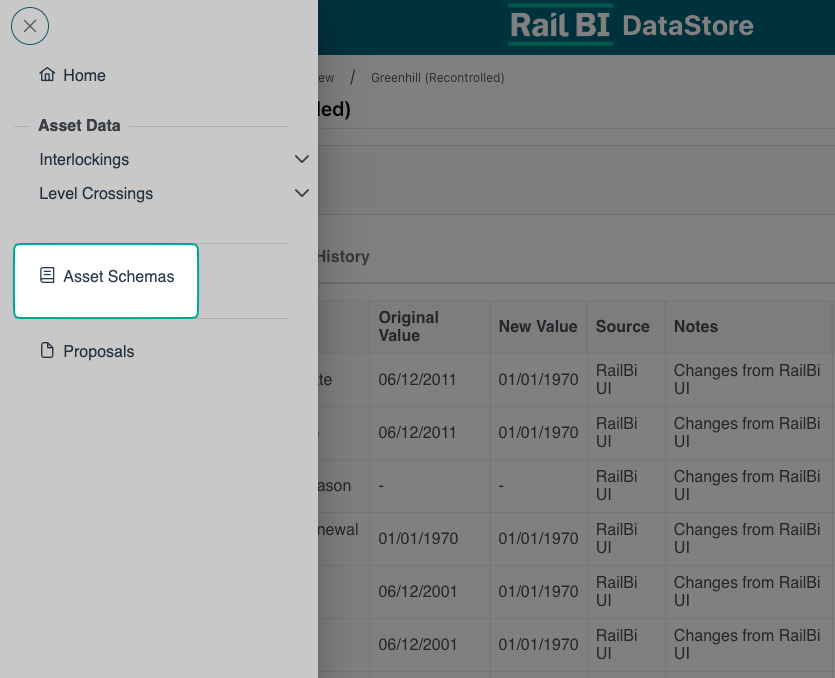
A list of all available schemas are then displayed.

Export
By selecting "Export" from the menu bar, users can export a copy of the currently displayed data.
This export is provided in CSV format and is downloaded automatically to the browsers default download location.
Some browsers may prompt you to allow downloads from datastore.railbi.com before saving the CSV file.
Edit Schema
Only users with the Schema Editor permission can edit or update schema.
Schemas are listed by asset type and can be edited by selecting the "Edit" icon.
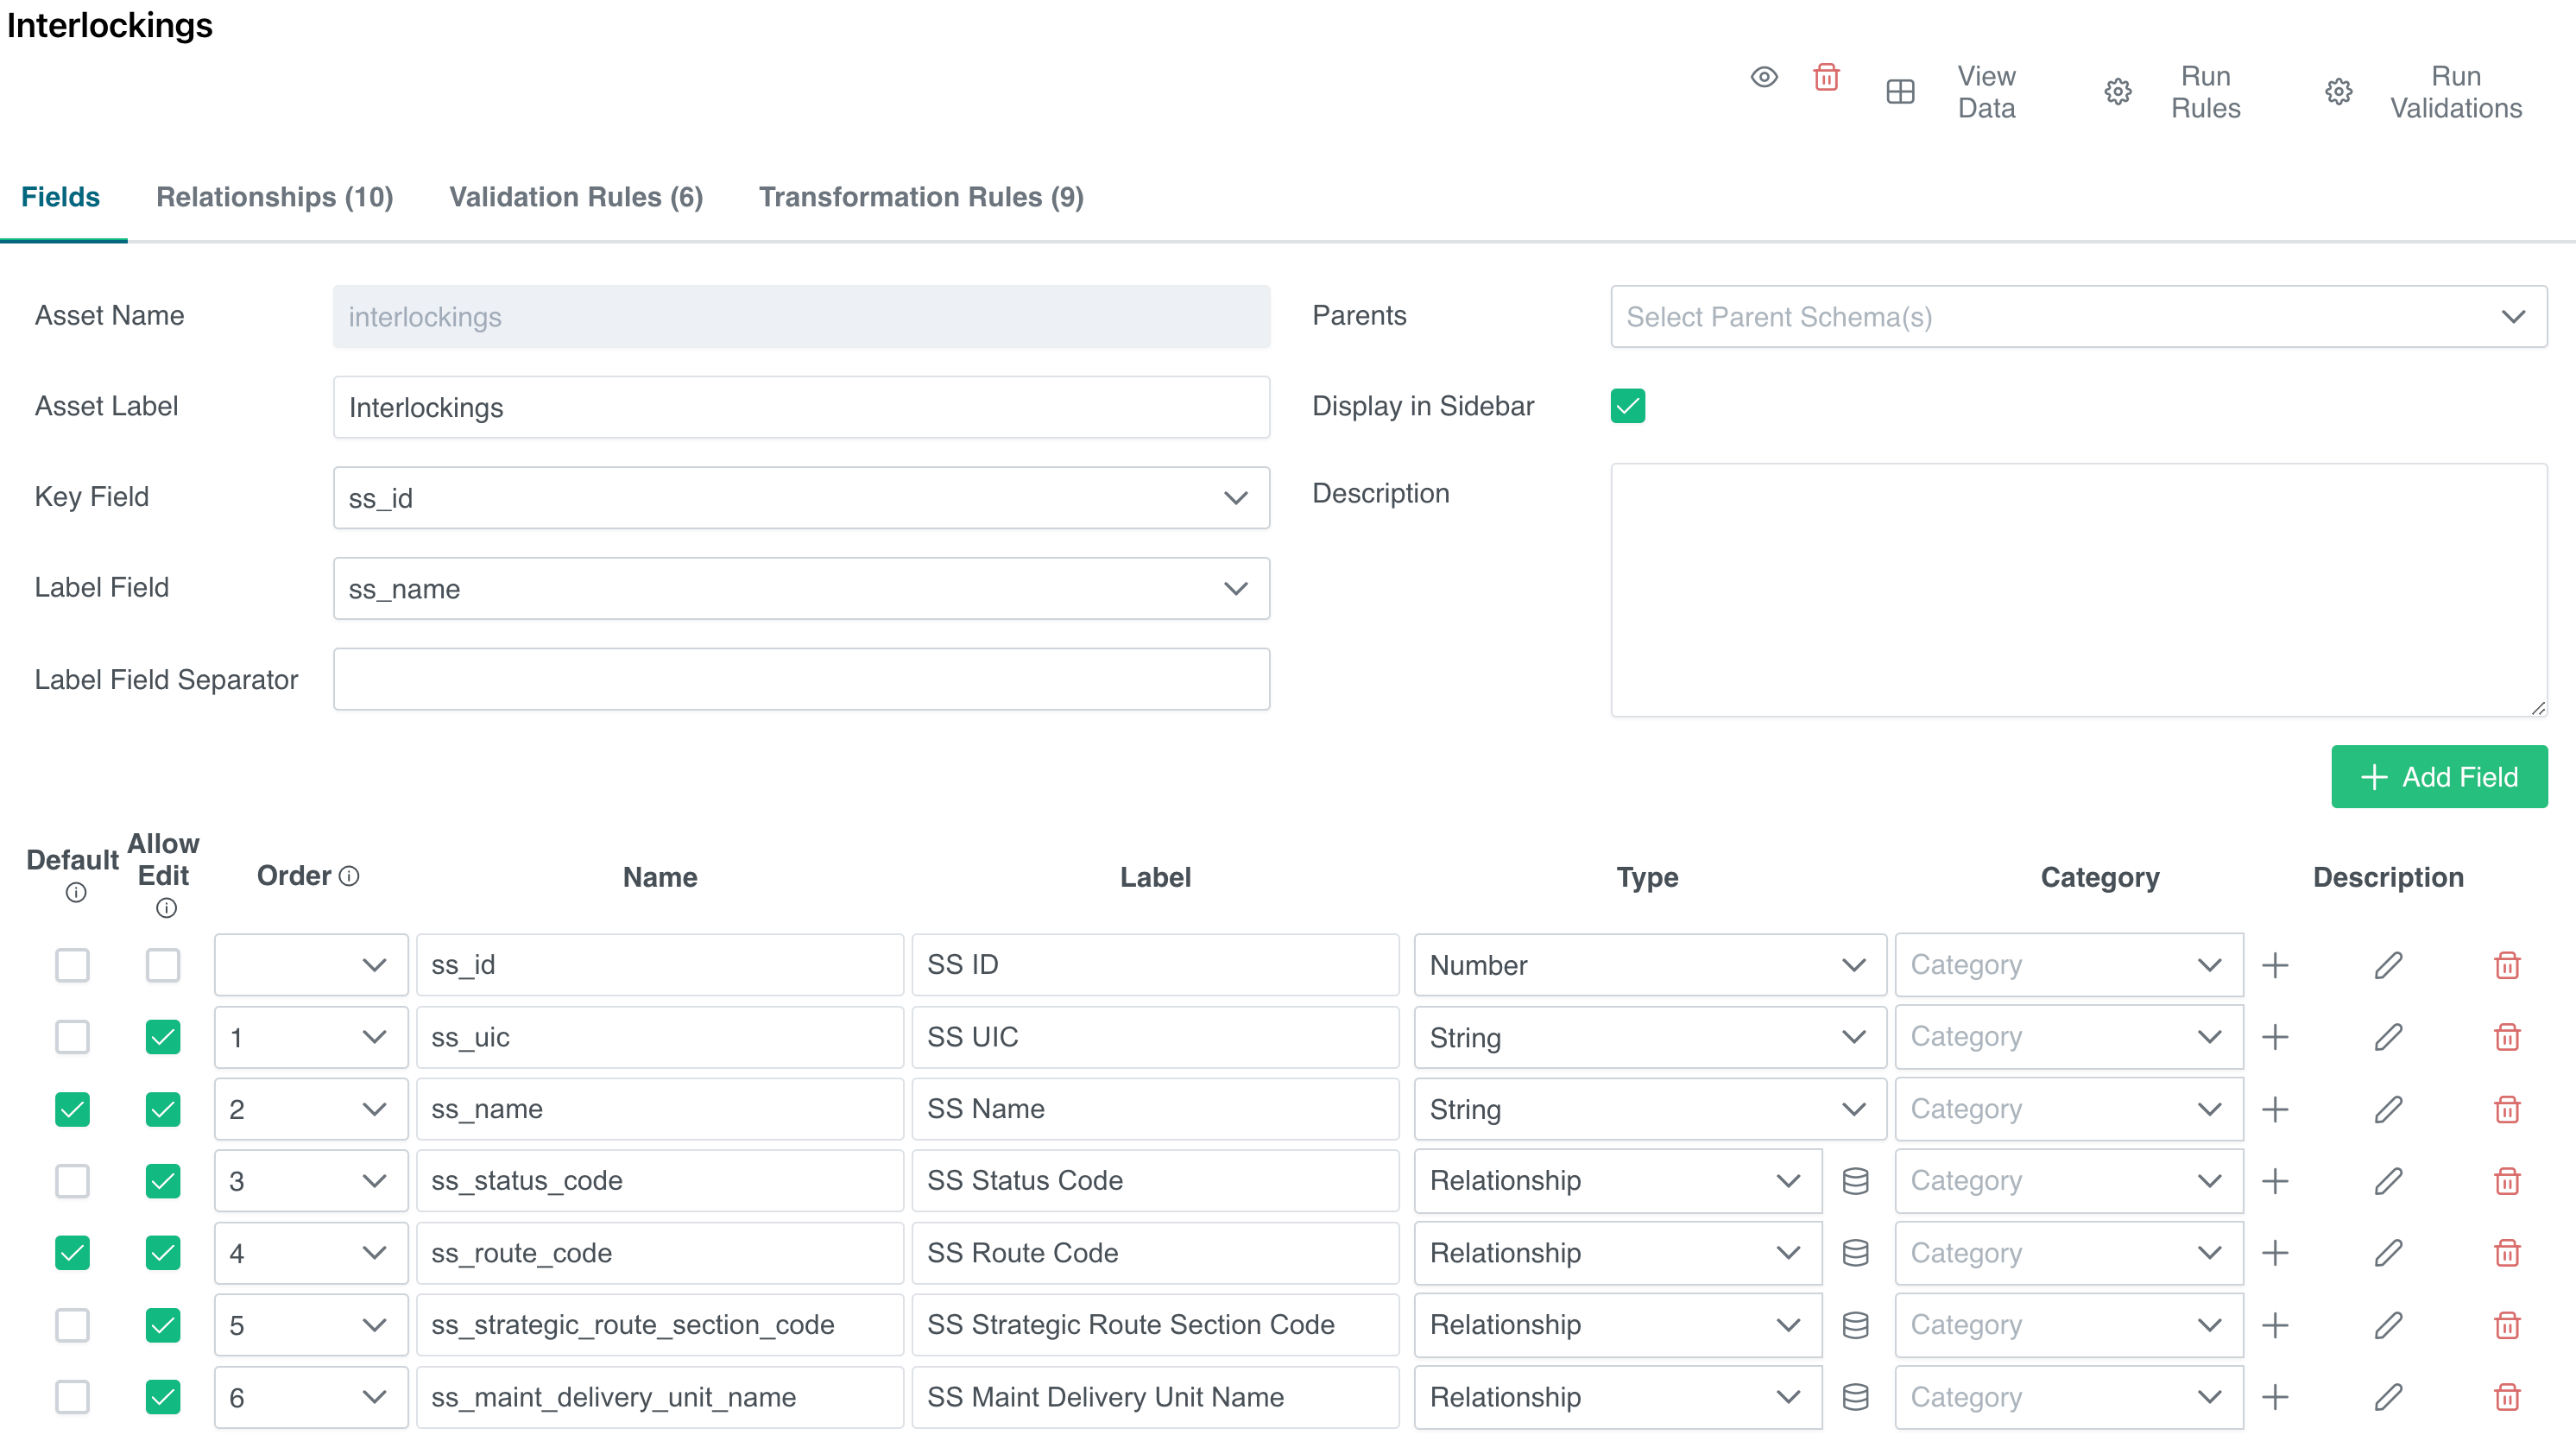
Schema Fields
The "Fields" tab displays all of the current fields available for this schema.
To add a new field, select the "Add Field" button. The new field will be created at the bottom of the schema.
The following are required when adding a new field:
- Default - default fields are always displayed on the asset area records view.
- Name - database name of the field being created.
- Label - display name of the field.
- Type - data type to be stored.
Once the field has been created, click save.
Relationships
Relationships allow assets to be linked.
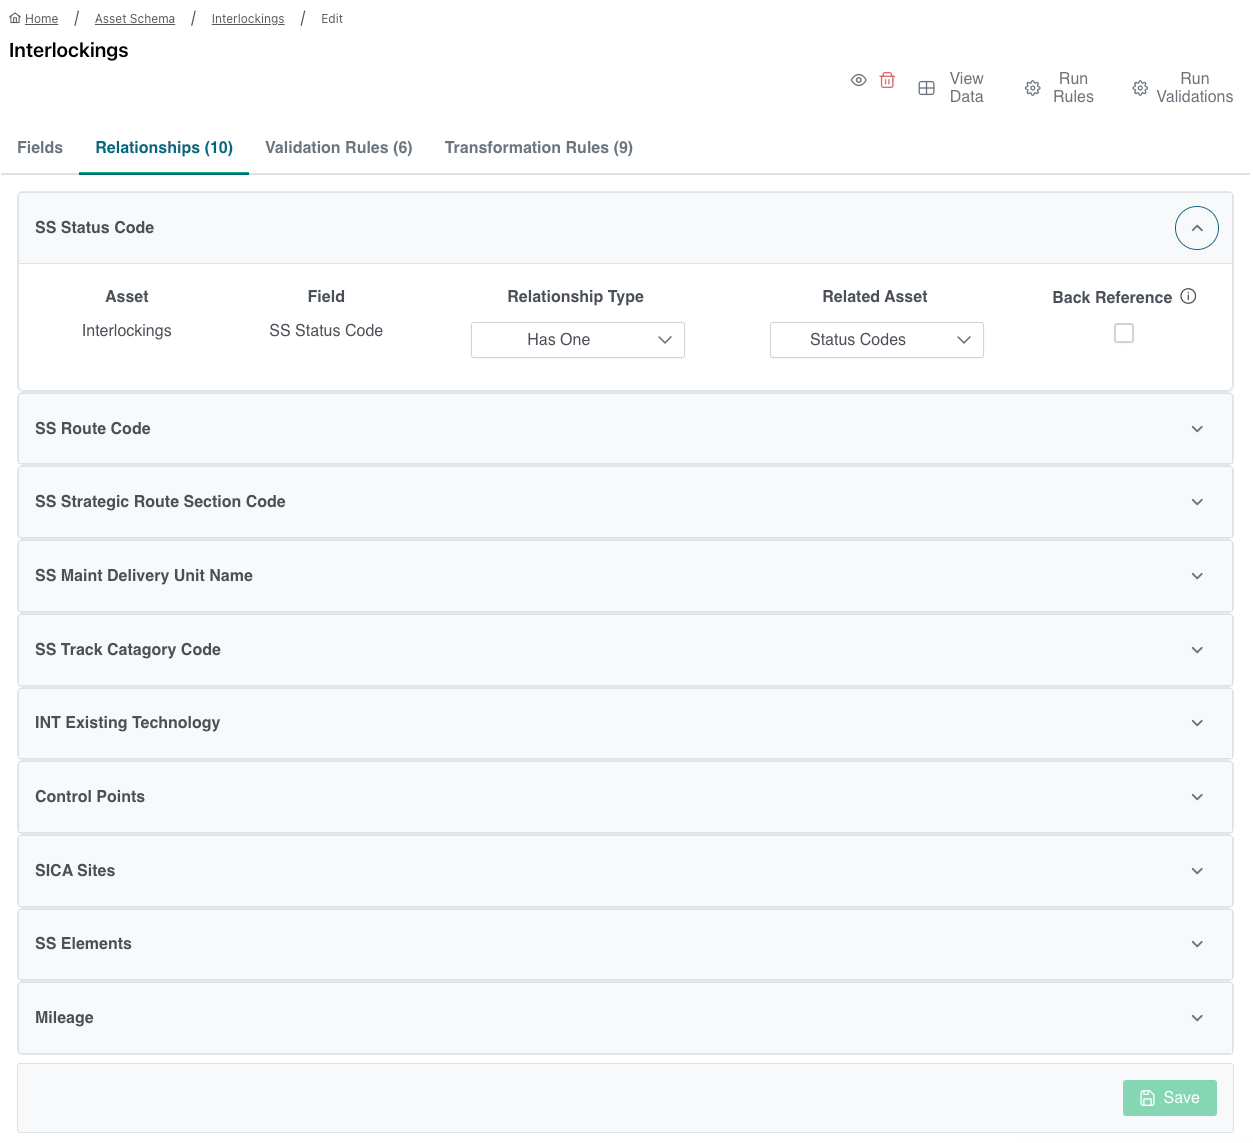
There are two types of relationship:
- Has One - one field from the related asset is required for the field.
- Has Many - more than one field from the the related asset is required for the field.
To create a new relationship, change the schema field type to "relationship" and select the database icon.
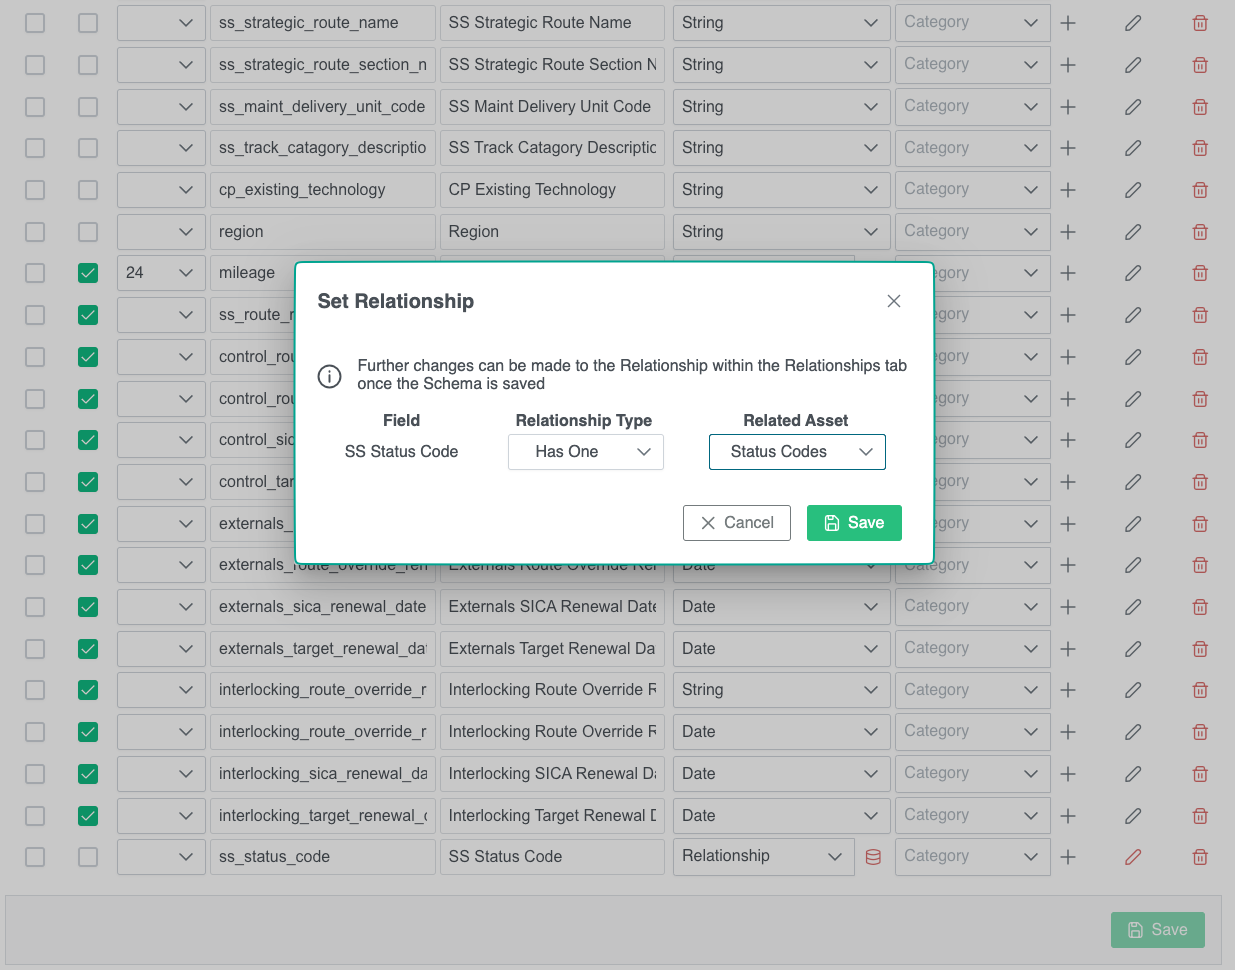
Select the required relationship type, followed by the related asset schema.
To save the relationship, click "save".
Validation Rules
Validation rules limit what data can be entered into the field.
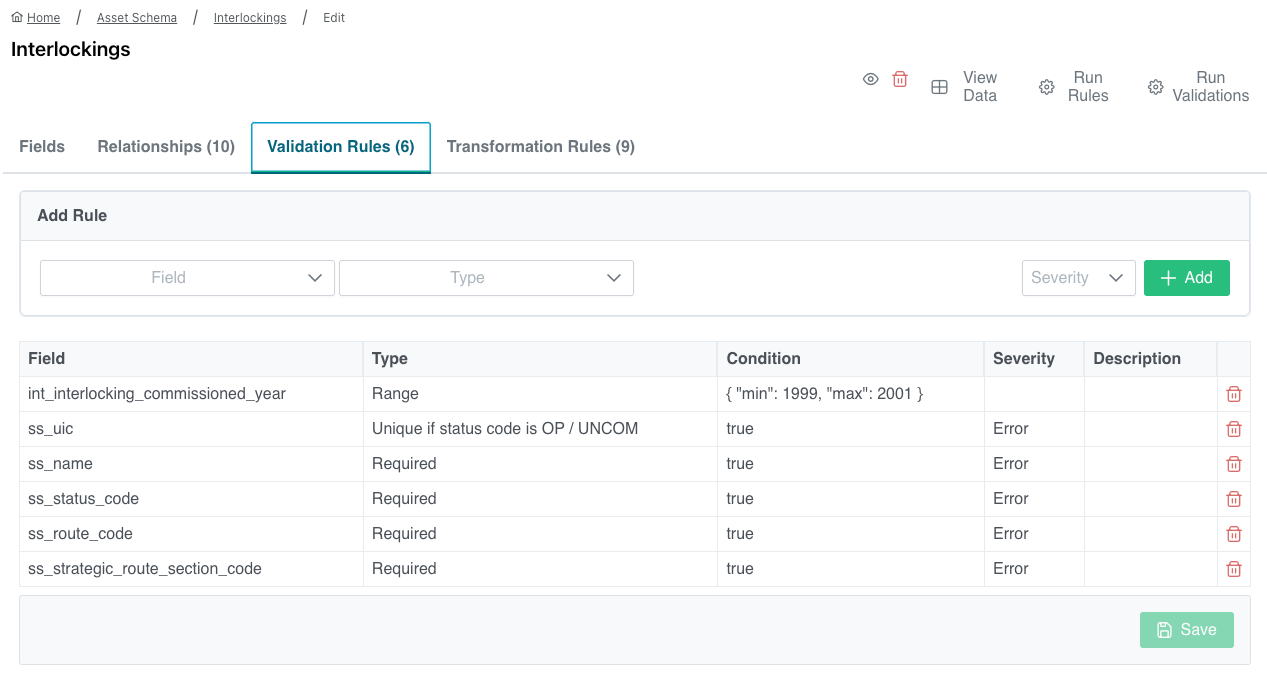
Several different validation opens are available by selecting
The data can be rejected in two ways:
- Warning - warn the user the data is not in the required format, but have the option to accept the warning.
- Error - not allow the data to be submitted.
Warnings are also displayed on the "asset area overview".
To add a new validation rule, select the field name and validation type from the header bar. Once the validation has been created, click "add".
To delete a current validation rule, click on the "delete rule" icon.
To test all validation rules, select the "run validations" icon from the header bar. This will display a list of asset data that does not meet the current validation rules.
Transformation Rules
Transformation rules can be set to pull data from another field and assign or convert it into a another field (i.e. distance conversions).
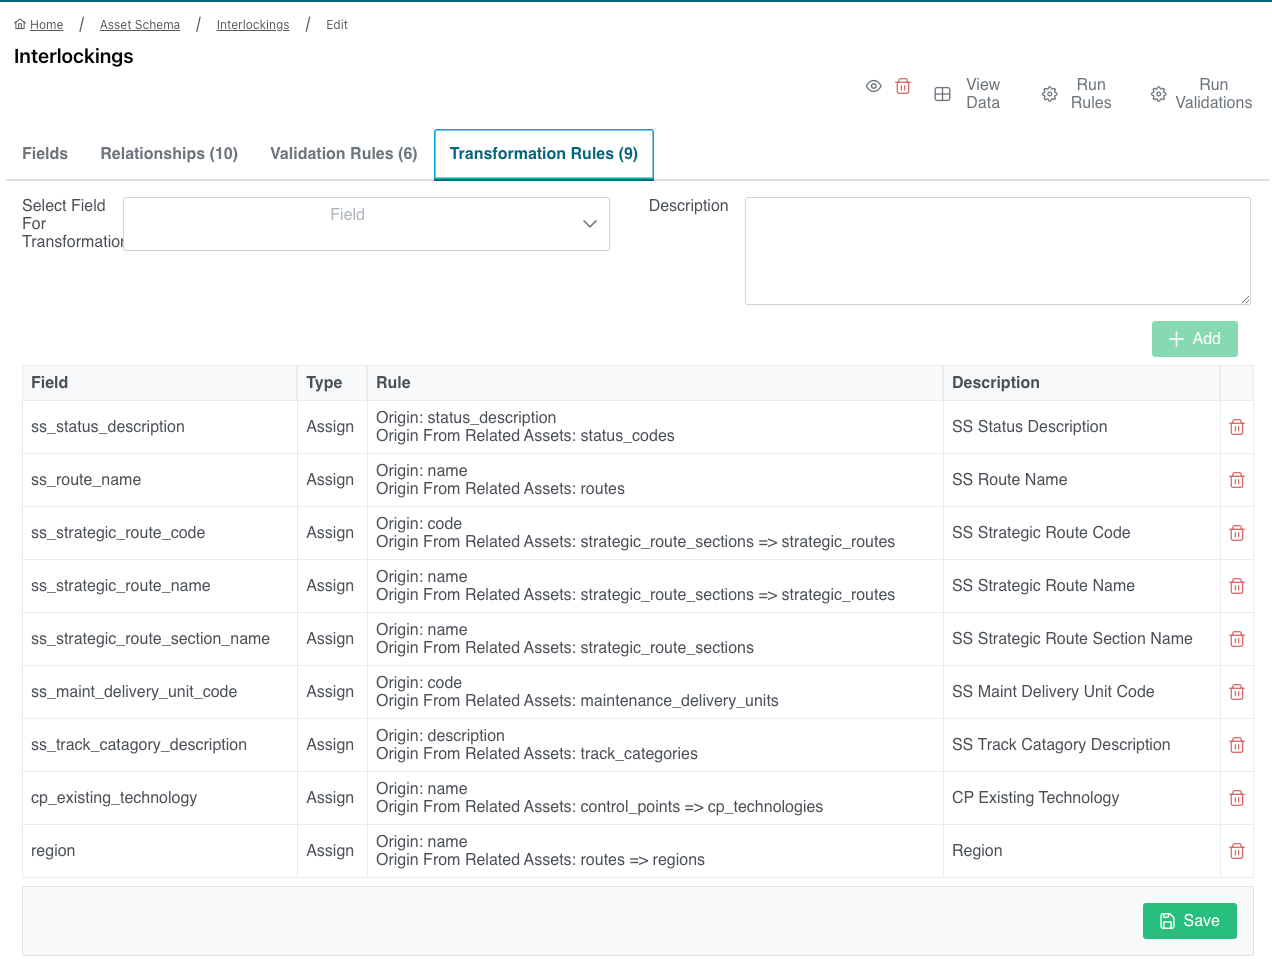
To add a new transformation rule select the field for the data to be stored, followed by the transformation type.
- Assign - assign the value of another field to the selected field.
- Conversion - convert the value of the selected field to the field being transformed.
- Primary / Secondary - assigns to primary field, falls back to secondary field if not set.
Once the source field has been set (along with a description), click the "add" icon.
To run all current transformation rules on the selected asset type, select "run rules" from the header bar.
Any images contained within this documentation are for demonstration purposes only. Condition and Renewal information have been generated specifically for this purpose and do not reflect the assets true status.